I have had my DJI Mavic since the drone first came out, and I have tried many different filter kits for the Mavic Pro. Some work great, and others are a waste of money. I am going to walk you through why you need Mavic Pro filters and which filter kits are the best.
First, I will cover the most important things to look for when buying filters for the DJI Mavic Pro; then, I will explain why you need filters and how to use them for the best Mavic footage possible.
1. Only Buy a Filter Set That Passes Auto-Calibration of the Mavic Pro Gimbal
The biggest thing to watch out for when looking for Mavic Pro filters is that they pass the start-up calibration. The gimbal on the Mavic Pro and Mavic Pro Platinum is very small and can’t take a lot of extra weight. Some of the first filters for the Mavic Pro were too heavy and would have to be installed after the gimbal ran through its startup.
Besides being super annoying, I always felt like I was going to break the gimbal when putting the filters on while the gimbal was activated. Also, I personally found that these heavier Mavic filters would cause gimbal issues mid-flight and cause poor gimbal movements, and sometimes even cause the gimbal to reset mid-flight.
These heavy filters that don’t pass the calibration are still being sold, unless you are really tight on money, don’t buy them. They are the cheapest ones, but if you fly your Mavic enough to want to purchase filters, spend the extra few bucks and buy ones that pass the start-up calibration.
Also, even if the listing says “Passes Start-up Calibration,” make sure to read the reviews and see if it actually does.
2. The Best Mavic Filters are ND + PL
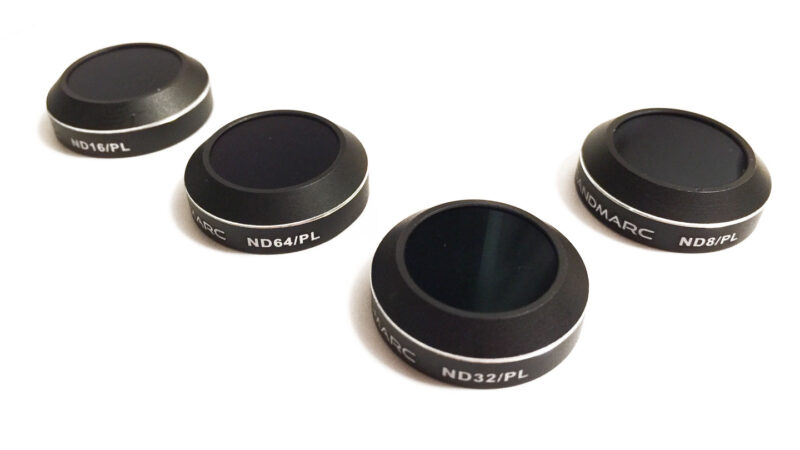
ND stands for Neutral Density Filter – Which acts like sunglasses for your Mavic Pro. They will darken what the camera sees, so you can use a lower shutter speed to make your footage look smoother and more cinematic.
They are rated by how strong (how dark) they are, the higher the number the stronger or darker they are. Commonly sold are ND4 up to ND64 for the Mavic Pro.
PL stands for Polarizing Filter – This type of filter reduces glare and brings out better saturation and clarity in your photos and videos, especially when filming around water.
ND+PL Filters have both in one filter – These Mavic Pro Filters are the best of both. You will get nice saturation and clarity from the PL, and you will be able to control the shutter speed and exposure with the ND.
For my personal style and taste, I would always choose ND+PL filters. I think a polarizer makes just about everything look better.
Bonus tip: If you don’t like what a polarizer is doing to your shot but you need the ND effect of the filter, you can just rotate the ND/PL a quarter-turn (90° in either direction), and the polarizing will not happen and it will act just like a standard ND filter without the PL effects.
Related Article: Best Travel Drones Compared & Drone Tips
3. Get a larger filter set for your Mavic Pro
The third most important thing to consider before buying filters for a Mavic Pro or Mavic Pro Platinum is to buy as large of a filter kit as you can afford. The bigger the better, obviously, but here is why.
In a larger filter kit, you will get a wider range of ND filters so you can choose the right one for how bright your scene is. The light changes all day long and from day to day – if you want the best footage – the more filters the better. I have this filter set that has every filter I need.
The Filters I use the most:
ND32+PL – For bright midday sun. I find that during the day, I use this filter more than any other because it darkens my shot enough so that I can use a shutter speed of 1/60 when I am shooting 30 frames per second, which is the right ratio. More on shutter speed vs. frame rate settings on Mavic Pro below.
ND8+PL – My second most used filter is the ND8+PL because, for days where it isn’t as sunny, this gets my scene right for the correct shutter speed. I shoot primarily 4k at 30fps, if you shoot at 60fps you may find a lower strength filter like an ND4.
PL – I love to fly and film things at sunrise and sunset. Everything looks great then, but I don’t need to darken the scene with an ND filter. The PL filter will make the clouds crisper and help bring out the colors of the sky. I use this filter when I don’t need the scene to be darker to adjust my shutter speed.
These generally work, but if you had the ND strengths in between you can really dial in your settings for the best possible footage. Other filters that are great to have are ND16+PL, ND4+PL, ND64+PL.
| Brand | Mavic Filters included | Pass Start up Cal. | Rating | Price | Check Availability |
|---|---|---|---|---|---|
| SANDMARC | PL, ND4/PL, ND8/PL, ND16/PL, ND32/PL, ND64/P | Yes | 4.9 | $139.99 | Check Prices |
| SANDMARC | ND4/PL, ND8/PL, ND16/PL, ND32/PL | Yes | 4.7 | $99.99 | Check Prices |
| PolarPro | ND4/PL, ND8/PL, ND16/PL, ND8, ND16, ND32 | Yes | 4.1 | $149.99 | Check Prices |
| PolarPro | ND4/PL, ND8/PL, ND16/PL | Yes | 4.6 | $79.99 | Check Prices |
| PolarPro | ND32/PL | Yes | 4.8 | $29.99 | Check Prices |
| SKYREAT | UV, ND4/PL, ND8/PL, ND16/PL | Yes | 4.5 | $49.99 | Check Prices |
Mavic Pro Filter Review
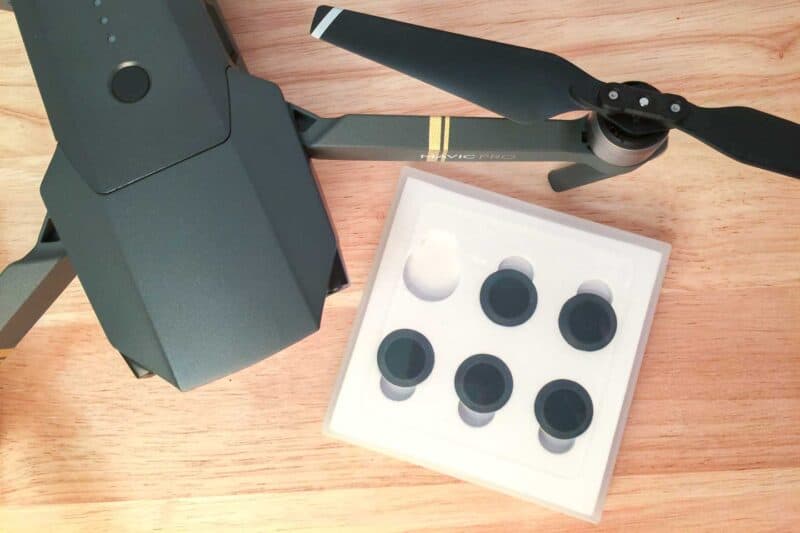
I personally use and have been very happy with the SANDMARC Pro Plus filters for Mavic Pro. This filter pack is always in my bag and the footage I am getting from these filters looks great.
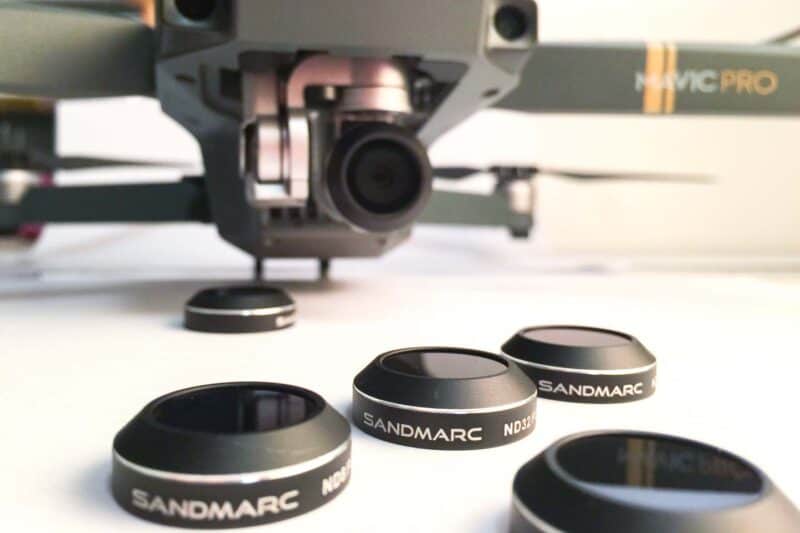
The kit comes with a nice heavy plastic case that holds all 6 filters with a closed-cell foam holder inside. The kit comes with PL, ND4+PL, ND8+PL, ND16+PL, ND32+PL, and ND64+PL.
The filters fit nice and snuggly on the camera but are not difficult to install or remove. The quality looks good and the rings are metallic, not foam like other cheaper versions.
The one minor complaint I would have about these filters is the polarization isn’t marked to help line it up on the camera. This isn’t a huge issue I have just found the point and marked it myself.
– Buy this filter set special 10% off with code: gettingstamped10
Why do you need Mavic Pro Filters?
Filters for your Mavic are one of the best accessories you can buy that will truly improve your footage. Once you put these on for the first time, you’ll see how much better everything looks, and you won’t want to fly with them again. Here is a bit about what each filter does and when to use it.
Why do you need PL or Polarizer Filters for Mavic Pro?
If you are looking for better saturation and fewer reflections while flying over water, you will need a PL filter for your Mavic.
Why do you Need ND Filters for your Mavic Pro?
If you fly your Mavic Pro a lot during the day in bright conditions, you will want ND filters for more cinematic footage from your Mavic.
Why do you need ND+PL filters for Mavic Pro?
The best filters are both ND & PL filters. With this type of filter, you will get great-looking water and landscapes from the PL filter, and the ND portion will darken the whole frame so you can use a slower shutter speed for better-looking cinematic shots.
When to use ND Filters on the Mavic Pro
ND filters are used to reduce the overall brightness of what the camera sees so you can properly adjust the Mavic’s camera to the correct shutter speed for better, more cinematic footage.
- ND64 – For extremely bright days with light-colored subjects, like a sandy beach.
- ND32 – Best for very bright, full sun days.
- ND16 – For partly cloudy days or early to mid-morning, medium light.
- ND8 – For partly to mostly cloudy days or approaching sunset or after sunrise.
- ND4 – For a minor reduction in brightness to adjust the shutter speed.
When to use PL Filters on your Mavic Pro
Unless the light is too low, I will just about always use a PL Filter on my Mavic if I can. I prefer the footage that comes out of the Mavic with a PL filter on at just about all times of the day. This is also why I like to use ND+PL filters so I can have polarization plus the ND filter to adjust my shutter speed.
Understanding Shutter Speed vs. Frame Rate with Mavic Pro
One of the main reasons you may want filters for your Mavic drone is to control your shutter speed for more cinematic footage. The most widely accepted rule of shutter speed vs frame rate is that your shutter speed should be double your frame rate.
Why? This has been studied by Hollywood for years, and this ratio gives the most natural and realistic motion blur. Our eyes and brains are programmed to assume that when things move, they are going to have just a slight amount of motion blur or unsharpness. This is also called the 180° rule, which involves a fancy formula – but it’s easier to remember to just double your frame rate.
- When a shutter speed is too slow like 1/30 at 30fps there is too much blur the footage can look soft or unsharp.
- When the shutter speed is too high like 1/1000 at 30fps there will be no motion blur and look unrealistic and just weird (soap-opera-like). This can look especially choppy when speeding up the footage while editing.
- The proper ratio you should always try to achieve in your Mavic footage is 2:1. For 30fps this should be 1/60 shutter speed, and for 60fps it should be 1/125 (in this case 1/120 does not exist and the 1/125 is the closest match and perfectly acceptable).
- If you don’t have a big filter kit with every strength filter, you can usually make up for it by adjusting your ISO settings up while using a stronger filter. Even if you can get it exactly at 2:1, the closer you are the better the footage should look.
Getting your shutter speeds vs. frame rate right is even more important on a drone than on a normal camera because the drone is almost always moving, creating motion. Also, the Mavic moves very fast and if your shutter speed is too high the footage can start to look very choppy, this is also made worst when you speed ramp and speed up footage when your subject is close. The frame rate is too fast, which has ruined footage for me to the point when it gives you a headache to watch.
How to install Mavic Pro and Mavic Pro Platinum Filters
You might think you can simply take the filter out of the case, stick it on the camera and fly. This is not always the case. Here is how to install filters on the Mavic Pro based on the type of filter.
If you are using PL or ND+PL filter – They are directional and you need to put them on the camera in a very specific way. The lines of polarization need to be lined up correctly to the camera. That’s why it’s best to buy filers that are marked, they will have a line or small marking and you put that mark at the top of the camera lens when you install it, and then it’s right. If you choose a filter kit without these lines, you can find the right spot on the filter and mark it yourself.
If you are using Start-up Compatible Filters for the Mavic Pro – I like to push these on while the gimbal clamp is still installed to ensure I don’t mess with the gimbal. Make sure it is fully installed to maintain a good balance on the gimbal. Make sure if the filter is a PL or ND+PL filter that it is orientated to the camera properly.
If you are using the old-style or a cheaper version that is not Start-up compatible – First remove the gimbal clamp and cover and turn on the Mavic Pro just like normal. Wait for the gimbal to finish its calibration. Very gently hold the bottom of the camera without moving its position with one hand. With the other hand push the filter (properly orientated to the camera) on over the lens of the camera making sure it is fully installed. If it is not fully pushed on it can overload the gimbal or cause other issues in flight.
Other Essential Accessories for Mavic Pro Drones
Fast SD Cards – To get the best photos and videos, you need SD cards that can keep up with your drone. We have tested and rated the best SD cards for Mavic Drones, so you don’t have to.
Don’t forget to pin me for later!
