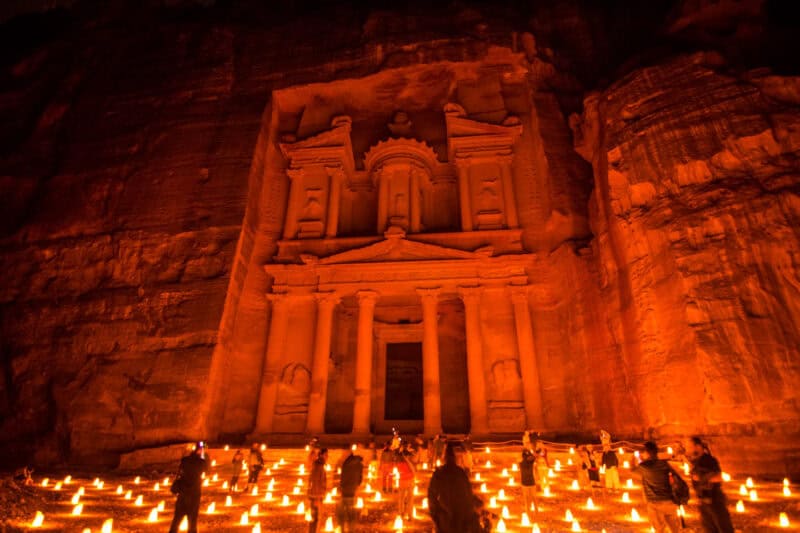
Everything you need to know about Petra by night and how to photograph it. I wrote this after a recent trip to visit the Petra night show, these are the things I wished I knew before going. I hope this helps you to better photograph Petra by night.
Jump information for Petra by Night:
- General Details about Petra by Night
- Photos of Petra by Night
- Petra by Night Photo Tips
- Camera Settings For Petra at Night
- My Camera setting for Petra by Night
- Advanced Guide to Photographing Petra at night
General Details Of Petra By Night:
Cost: 17 JND, plus transport cost
Hours: 8:30 p.m. to about 10:30 p.m. – note this includes the 30-minute travel time between the entrance to the Petra Treasury and back. You’ll be required to leave the area around the Treasury just before 10:00 p.m. leaving just 1 hour to photograph Petra at night.
Special notes:
- Tripods are allowed
- Tea is provided during the show
- The show is about 20-30 minutes, the length of two songs and a short narrative
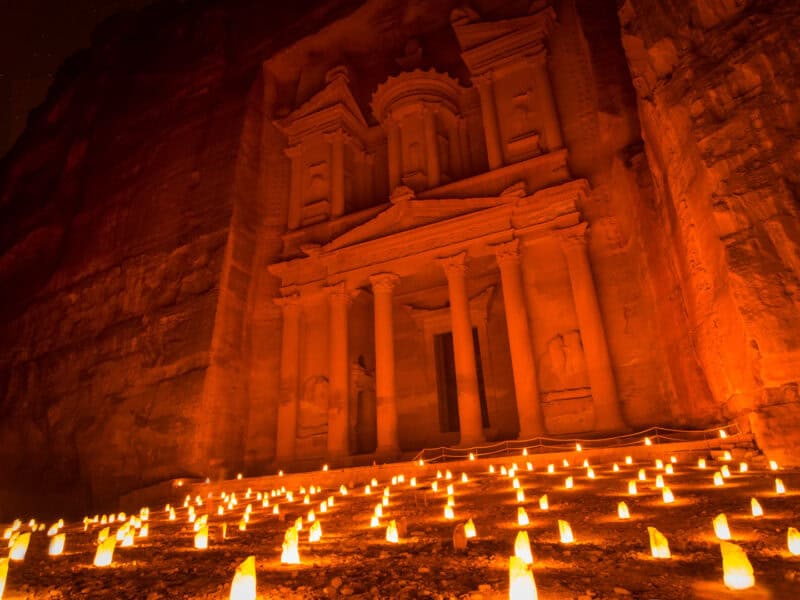
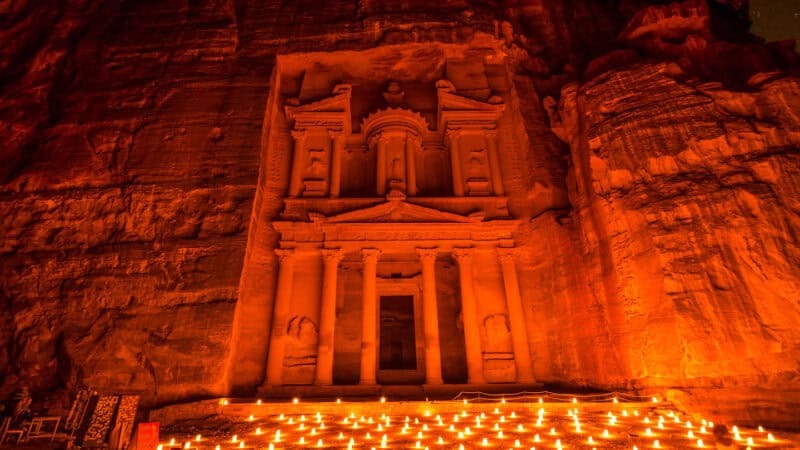
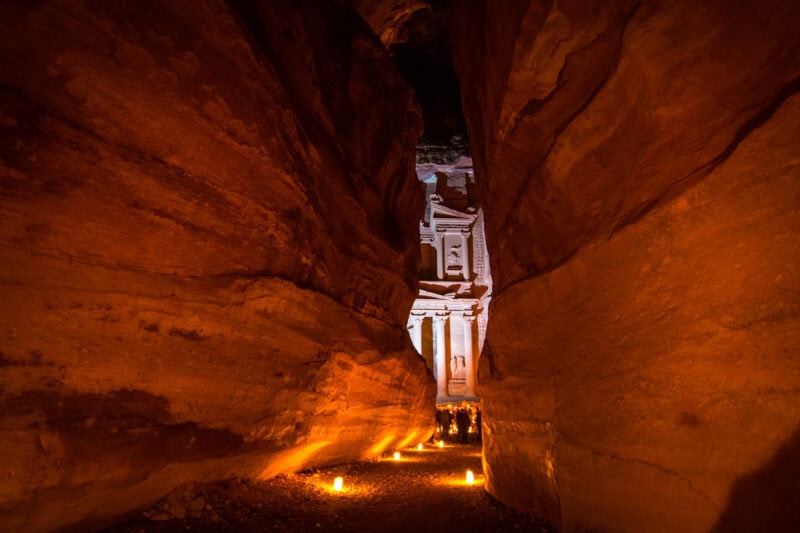
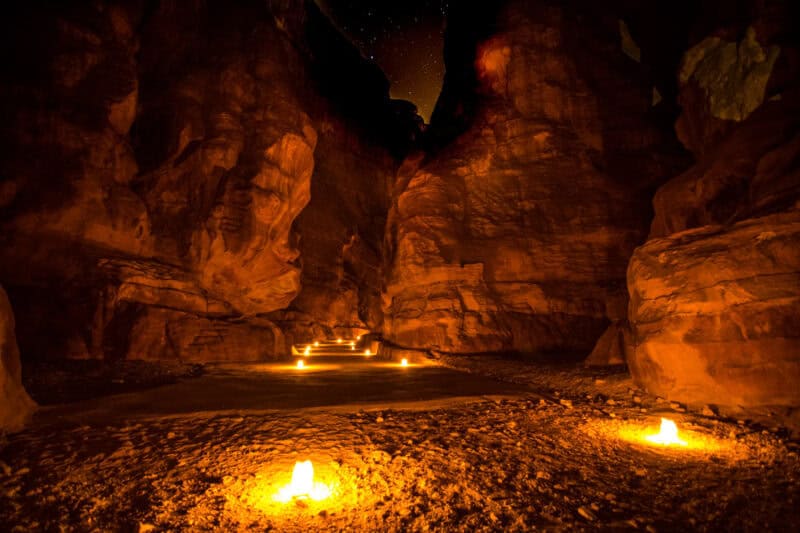
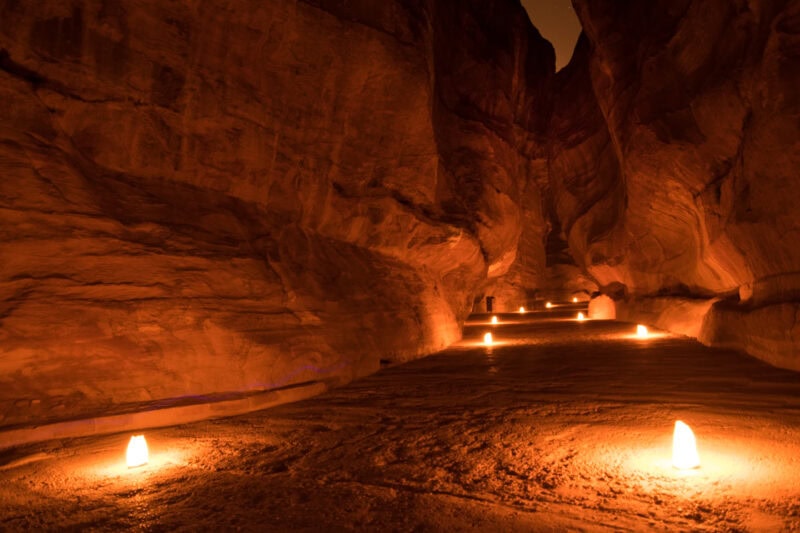
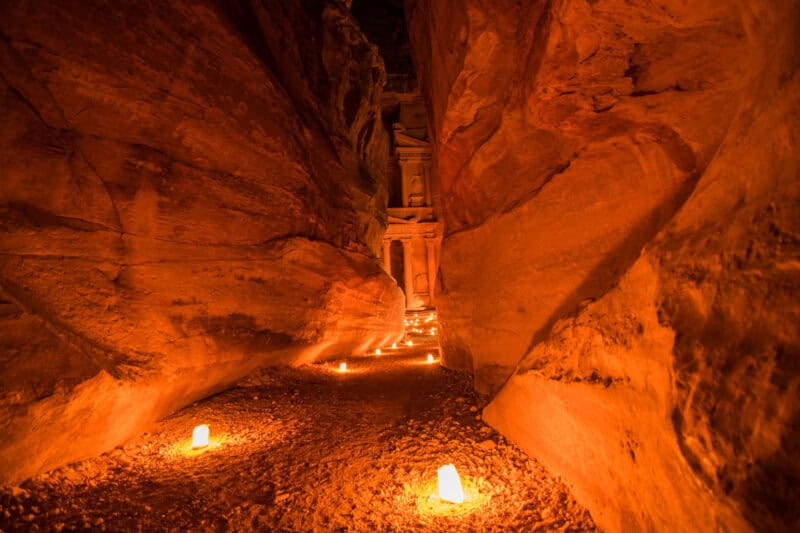
The night show is a separate ticket from the entrance fee to Petra. The night ticket to Petra will grant you access to the site after dark. From the entrance to the Treasury will be lit candles to guide you along the 1.3 mile (2.1 km) path.
Photos of Petra by Night
Petra at Night Photo Tips
Arrive Early To The Gates
Officially, the site opens for Petra by night at 8:30 pm, but be there waiting as early as 8:00 pm. You may be let in earlier depending on the staff. The allowed time on the site is very short, so getting a jump on the rest of the people will allow you more time to set up and get more shots.
We arranged our tour through Abraham Tours, and our guides were very helpful in coordinating these details for us. If you really want to get a jump on the rest of the guests, take a horse carriage to the treasury and skip the walk. However, the walk is beautiful and lit the entire way with lanterns. I would suggest at least walking back if you ride in.
Take Your Classic Shots During The Show
As you enter the area of the Treasury, you will be asked to sit on the rugs they have set up in front of the Treasury. You don’t have to sit here, but if there is a front-row seat in the center of the Treasury, I would take it. If not, I would opt not to sit but be free to move around and photograph Petra at night from many positions around the Treasury.
Be Quick
I can’t stress enough how little time you have at the site, especially with the long walk to the Treasury of Petra. The Petra by night show is the best time to take photos without other people screwing it up. Before and after the show, people will be walking through, and there will be a lightning storm of flashes. The show is only 2 songs long and goes by very quickly, especially when you are using long-exposure photography techniques.
Set Your Focus Point Before The Show Starts
One of the most difficult things about photographing Petra at night was to get a good sharp focus on the face of the Treasury. Even though your eyes can make out the columns, they are too dark for many cameras to get a sharp focus point. This is especially true if you are using a wide-angle lens.
Top-end cameras like the Sony A7 or Nikon D810 with better sensors will have an easier time with this. It’s best to bring a strong flashlight with you and shine it on a column to set your autofocus. After you set your focus point, don’t forget to switch the focus to manual.
If you have a partner visiting the night show at Petra with you, have them take the flashlight close to the columns before the show to help set the focus point. Don’t use your flashlight during the show, don’t be that guy.
Use The Show Time Wisely
During the show, you have the best opportunity to take photos without people and without other people’s flashes ruining the beauty of Petra by night. After the show, people will be walking through the lanterns taking selfies, making a clean shot impossible.
The Petra staff will start chasing you out before 10 p.m. and then keep you moving quickly back to the entrance.
Don’t Use Your Flash
Many people will take lots of photographs with the flash on before the show, but it’s not the picture you want. With the flash on, the face of the Treasury will appear almost white, and you’ll lose all of the beautiful shadows and night lighting at Petra. Use a tripod and try long exposure methods (examples below) or set your camera to a no flash mode and keep it very still.
Be Respectful Of The Non-Photographers
However, there is clearly something wrong with these people who’d rather watch the show and enjoy the beauty of the scene than have their faces pressed against a camera. You still need to respect them and the performers who are playing music during the show.
It’s amazing how quiet the canyon in front of the Treasury of Petra by night can be. Any small noise is amplified and heard by everyone. Avoid fumbling with gear; have your tripod set up and all unnecessary items packed away to be as quiet as possible. If you haven’t already, turn off all the beeping and other sounds your camera makes while focusing and changing settings.
Trust me, you’ll feel like everyone’s eyes are on you if you’re making a lot of noise here (even if you can’t see the eyes). Before and after the show it is free for all so keep your noisy activities for this time.
Camera Settings For Petra By Night
Your settings will vary somewhat depending on the camera gear you bring. These settings are for using long exposure techniques and a tripod. All of my photos of Petra at night are taken from my small compact travel tripod. Without a tripod, most of these shots are not possible without losing a lot of the details.
Compose Your Shot
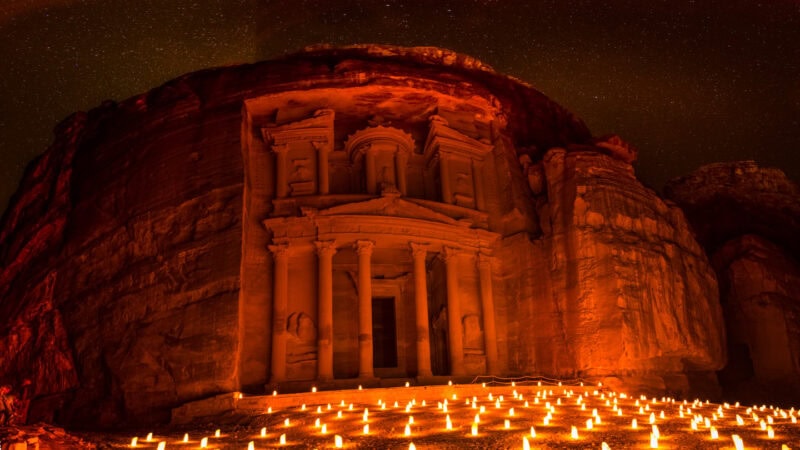
Find a composition that is appealing to you. Make sure to capture all the elements that make the scene special to you. For me, capturing the candle lanterns and the full face (or as much as I could) of the Treasury was important.
Set Your Focus Point
As mentioned above, setting your focus is challenging in very low-light situations like Petra after dark. If you haven’t set your focus before the show starts or you want to move positions, first try to auto-focus on a bright part of the columns.
If that doesn’t work, you may be able to use the light from a row of lanterns placed just in front of the columns. Be careful if using a wide aperture (low f-number i.e. f2.8) because you will only have a very shallow depth of field (a very small window in the direction of the shot that is in focus).
Another method if autofocus isn’t working is to switch to a live view mode using your LCD screen and digitally zooming in on the screen, and manually dialing in your focus. This takes some practice and will take time away from your already short visit to Petra by night. I suggest practicing this method before applying it and betting all your Petra night photos on a new technique. Also, check after taking your first shot to ensure the shot was in focus, if not try to correct it.
Put Your Camera In Manual Mode
To take the best photos of the Petra night show, it’s best to use full manual mode on your camera. If your camera doesn’t have this or you’re not confident in your manual mode skills you can also use the “S” or “A” modes of your camera.
The “A” mode lets you pick the aperture, and the camera decides the rest of the settings. If using “A” or Aperture Priority, set your aperture to the lowest setting the camera/lens will allow. If using “S” or Shutter Priority, adjust the setting to the longest shutter speed your camera will allow, most times it will be 30 seconds. To see the settings I used for my visit to Petra by night see below.
Set Your Aperture
Start with your camera at the widest aperture (the lowest F-number) for the lens I used it was f2.8. This will allow the most light in and will allow you to use shorter exposure times and less ISO.
Set Your Exposure
Set it to as long as your camera will allow, most cameras it will be 30 seconds. It’s important to keep your camera completely still and not bump it and make sure it is on a tripod or another sturdy surface.
Turn off Auto Stability on your lens
Built into most lenses is a feature to automatically stabilize your shot when you are hand holding your camera. However, during a long exposure on a tripod, this function will still be active and can cause your shot to be shaky while on a tripod. Most lenses will call this function OS on Canon and Sigma lenses, VR on Nikon and others. Switch it off for a stable shot on a tripod.
Use Self-Timer Mode Or A Shutter Release
As I said earlier any movement or bump will cause your photo to turn out shaky or blurry, this includes when you press the button to take the photo. Remove this shake by using a remote to take the picture.
If you don’t have a remote use the self-timer function of your camera which will delay taking the photo for 5 or 10 seconds after pressing the button. This delay will allow the camera to stop moving before the photo begins.
Take The Shot
Adjust Based On The Results –
If Using Manual Mode
Too Dark: If the photo turns out too dark when using the lowest f-number and 30-second exposure, then you will need to increase the ISO.
Too Bright: If the photo turns out too bright you can either narrow the aperture (increase the f-number) which will reduce the amount of light entering the camera, or reduce the amount of time the shutter is open. The advantage of increasing the f-number is it will give you more area of your photo in focus, and the advantage of decrease the shutter open time is it will allow you to take more pictures of Petra.
If Using “A” or “S” Modes
In these modes, you only have control of part of the camera’s functions, and the camera decides the rest, and it can be more difficult to get the correct exposure or brightness level. The main adjustment you can make is increasing or decreasing ISO, although if your starting point is 100 ISO, increasing ISO is the only way to make a change.
The other adjustment will change the camera’s calculations and make the photo brighter or darker. Set the “Exposure Compensation” up for brighter or lower for darker. This number is usually listed in what is called stops of light, and most cameras will allow you to adjust -2 (darker) to +2 (Brighter).
My Camera Settings for Photographing Petra at Night
- Camera: Nikon D5300
- Lens: Tokina 11-16mm wide angle lens
- Tripod: Mefoto Backpacker Travel Tripod
- Mode: Manual “M”
- Aperture: f2.8
- Shutter: 30 seconds
- ISO: 100
- Bracketed Exposures: -2, 0, +2 Usually skipping the +2 because my camera won’t go over 30 seconds and will not increase the ISO to get to +2.
Advanced Guide to Photographing Petra at night
Know Your Camera’s Useable ISO Limit
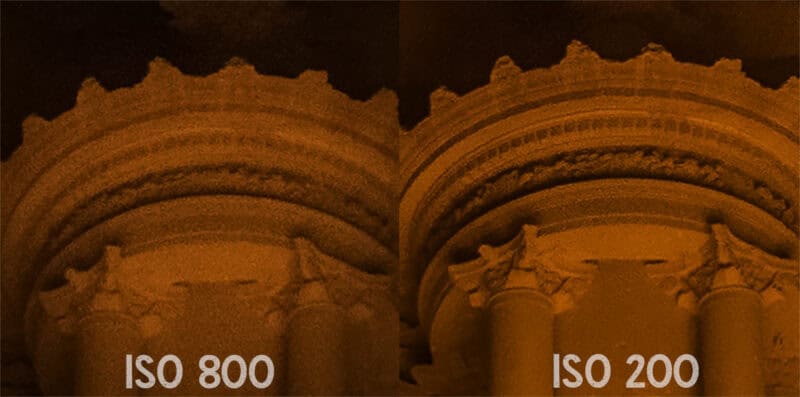
The biggest limitation most cameras have is their ability to produce clear images with high ISO. Since there is such a limited time for taking photos of Petra during the night session, if you can safely use some ISO in your photos without losing detail or adding significant noise, you can take many more pictures by reducing your exposure times.
A good place to check your camera specs using the details analysis on DPreviews, or just through trial an error I know even with noise reduction software I am not happy with my photos over 1600 ISO. There are a few cameras on the market now with such good ISO handling abilities you could theoretically handhold them during the Petra by night show and get good results, like the Sony A7.
Focus Stacking
When using wide apertures (low f-numbers), the depth of field (or the range of what is in focus) is so shallow that you may not get the face of the Treasury and the candles in front in sharp focus. Taking several shots with different focus points and stacking them in Photoshop could make for a sharp photo through the depth of the photo.
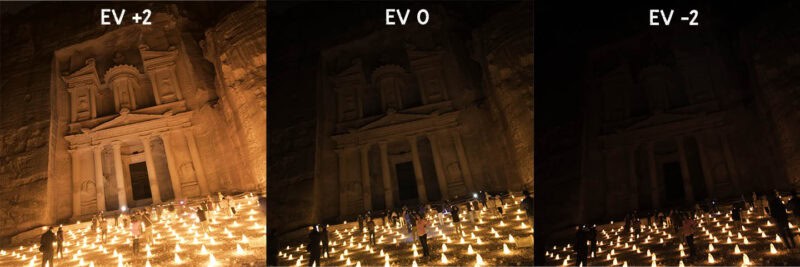
Use Bracketed Exposures – HDR
The scene at Petra at night is perfect for HDR photography because there are very big differences in brightness levels. In the foreground, you have bright candle lanterns and the face of the Treasury has both dark and light areas. Using HDR, you can brighten up the dark areas and dim the very bright areas to get a more balanced photo.
Shot In RAW Format
Taking photos in Raw format will allow much greater editing capabilities if you plan to edit your photos of the Petra night show. If you haven’t used editing software before, I recommend using Adobe Lightroom. The Lightroom software is free to try for the first 30 days and is a great way to edit photos from a big trip like visiting Petra.
If you have any questions or have any tips of your own for Petra by Night please leave them in the comments!
If you are contemplating traveling to Jordan, stop and just go! Wondering is Jordan safe read this article. We felt totally safe and welcomed, we can’t wait to go back to Jordan it was our favorite place in the Middle East.
We traveled with Abraham Tours with three others, but we know several female solo travelers who have visited Petra and have nothing but good things to say.
If you found this guide helpful lease Pin it!
